
Embarking on a 240sx manual transmission swap is a rewarding, albeit time-consuming, project. Expect a multi-day commitment, potentially exceeding the typical 12-hour estimate, especially for first-timers.
Why Swap to Manual?
The allure of a manual swap for the 240sx stems from a desire for enhanced driver engagement and control. Many enthusiasts find the automatic transmission lacks the responsiveness and connection they crave. A manual gearbox allows for precise gear selection, fostering a more immersive and enjoyable driving experience. Furthermore, a manual swap often unlocks the full performance potential of the KA24DE engine, or prepares the chassis for future upgrades like an SR20DET swap.
While the automatic is reliable, it can feel restrictive. The manual transmission provides a direct link between driver input and vehicle response, crucial for spirited driving and track use. It’s a fundamental modification for those seeking a more connected and dynamic driving experience with their 240sx.
Overview of the Process & Time Commitment
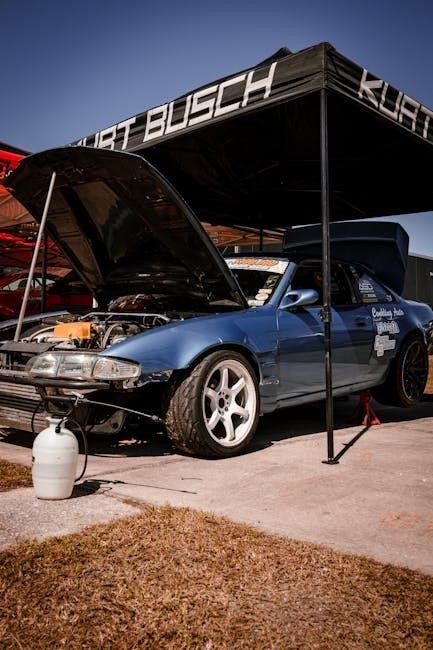
The 240sx manual swap is a substantial undertaking, involving the complete removal of the automatic transmission and installation of a manual system. This includes disconnecting the battery, draining fluids, removing the automatic, installing the flywheel and clutch, fitting the manual transmission, and addressing wiring for reverse lights. Expect challenges with the automatic transmission bushing – drilling is often more effective than pullers.
Realistically, allocate several days for the swap, especially if it’s your first attempt. While some claim 12 hours, a more conservative estimate is crucial. Proper tools, like extensions and swivels, are vital for accessing difficult bolts, particularly on the bellhousing. Patience and thoroughness are key to a successful outcome.

Essential Tools and Materials
Success demands the right tools: sockets, wrenches, extensions, and swivels are crucial. You’ll also need a transmission, clutch, flywheel, and potentially a compatible ECU.
Required Tools (Sockets, Wrenches, Extensions, Swivels)
Having a comprehensive toolset is paramount for a smooth 240sx manual swap. Invest in a quality socket set, including both metric and standard sizes, covering a range from 8mm to 24mm. Wrenches, particularly those with offset designs, will prove invaluable for accessing difficult-to-reach bolts, especially those securing the bellhousing.
Extensions are absolutely essential – various lengths will be needed to navigate the transmission tunnel. Swivels are equally important, allowing you to reach bolts at awkward angles; Don’t underestimate the value of a breaker bar for stubborn fasteners. A good impact wrench can also save significant time and effort. Consider a specialized flywheel holding tool to simplify that installation process. Finally, penetrating oil is your friend!
Parts List: Transmission, Clutch, Flywheel, ECU (if applicable)
Essential components for your 240sx manual swap include a compatible transmission – KA24DE options are common, with SR20DET swaps considered for future upgrades. A new clutch kit (disc, pressure plate, and throw-out bearing) is highly recommended, regardless of the previous condition. The flywheel must match your chosen transmission and engine.
ECU considerations depend on your model year. 1996 and newer (OBDII) models may require a manual transmission ECU to avoid error codes. Don’t forget necessary hardware like a new pilot bearing and potentially a transmission crossmember. Budget for fluids – specifically Redline 75W-90 GL4 gear oil – as other oils can damage synchros.
Fluids: Redline 75W-90 GL4 Gear Oil – Importance & Quantity
Selecting the correct transmission fluid is critical for longevity. Redline 75W-90 GL4 gear oil is the universally recommended choice for the 240sx manual swap, safeguarding your synchros against premature wear. Avoid GL4/GL5 compatible oils, as they can cause issues. Using anything else risks costly repairs down the line.
The required quantity is approximately 2.4 liters. Redline 75W-90 GL4 typically costs around $15 per bottle, so factor this into your budget. Proper fluid level ensures smooth shifting and optimal transmission performance. Don’t compromise on fluid quality – it’s a small investment for significant peace of mind.
Transmission Selection
For a straightforward swap, utilize a KA24DE transmission. If future SR20DET upgrades are planned, consider postponing the swap to streamline the process later.
KA24DE Transmission Options
When selecting a KA24DE transmission for your 240sx swap, several options exist, primarily revolving around the year and model of the donor vehicle. Generally, any KA24DE manual transmission will physically bolt up to your engine. However, consider the gear ratios and final drive. Transmissions from earlier 240sx models (1989-1993) often have slightly different gearing compared to those from later models.
Pay attention to the condition of the transmission; a used transmission may require servicing or rebuilding. Inspect for any signs of damage or excessive wear. Ensure the transmission includes the necessary components, such as the shifter linkage and speedometer drive. Prioritize finding a transmission in good working order to minimize potential issues post-installation. Ultimately, a well-maintained KA24DE transmission provides a reliable and cost-effective manual swap solution.
Considerations for SR20DET Swaps (Future Upgrade)
If you foresee a future SR20DET engine swap, it’s wise to factor that into your initial manual transmission choice. While a KA24DE manual transmission can work temporarily with an SR20DET, it’s not ideal. The SR20DET produces significantly more power, potentially exceeding the KA transmission’s limits.
Planning ahead and sourcing an SR20DET-specific transmission now can save considerable time and expense later. These transmissions are stronger and designed to handle the increased power output. Consider the associated costs of an SR swap – bellhousing adapters, custom driveshafts, and mounting brackets – and budget accordingly. Delaying the full SR transmission upgrade will necessitate a second transmission swap down the line.

Pre-Swap Preparation
Prioritize safety by disconnecting the battery before starting. Thoroughly drain both the transmission and differential fluids as a crucial first step in the process.
Disconnecting Battery and Safety Precautions
Before initiating any work on your 240sx’s drivetrain, disconnecting the negative battery terminal is paramount for safety. This prevents accidental shorts and potential electrical damage during the swap process. Always remember to support the vehicle securely with jack stands; never rely solely on a jack.
Working under a vehicle requires caution, so wear appropriate safety glasses to protect your eyes from debris. Have a fire extinguisher readily available, just in case. Be mindful of hot exhaust components and fluids. Properly dispose of all drained fluids according to local regulations. Taking these precautions will ensure a safer and more successful manual swap experience.
Draining Transmission and Differential Fluids
Prior to removing the automatic transmission, completely drain both the transmission fluid and the differential fluid. Use the appropriate sized wrenches to access the drain plugs on both components. Position a drain pan underneath to catch the old fluid, ensuring no spills occur.
Proper disposal of these fluids is crucial; do not pour them down drains or onto the ground. Many auto parts stores accept used fluids for recycling. Once drained, inspect the fluid for any metal shavings, which could indicate internal damage. Replacing these fluids with fresh, high-quality alternatives, like Redline 75W-90 GL4, is essential post-swap.

Automatic Transmission Removal
Removing the automatic transmission requires disconnecting various lines and linkages. Be prepared for a potentially lengthy process, especially when dealing with the stubborn automatic transmission bushing.
Removing the Automatic Transmission
The removal process itself isn’t overly complex, but requires methodical disconnection of components. Start by draining the transmission fluid, then disconnect the driveshaft, shift linkage, and all electrical connectors. Support the engine from above, as removing the transmission leaves it unsupported. Once everything is disconnected, carefully lower the automatic transmission using a transmission jack – it’s a heavy unit!
A significant hurdle is the automatic transmission bushing. Forget about bearing pullers; they often prove ineffective. Instead, prepare for drilling it out, potentially needing multiple drill bits as you progress. It’s a time-consuming task, and breaking a drill bit is a real possibility, so patience is key. This bushing removal is often the biggest bottleneck in the entire swap.
Dealing with the Automatic Transmission Bushing (Drilling Method)
The automatic transmission bushing presents a notorious challenge during a 240sx manual swap. Forget attempts with bearing pullers; they frequently fail to deliver results. The most reliable, though laborious, method involves drilling it out; Begin with a smaller drill bit and gradually increase the size, working carefully to avoid damaging the surrounding metal.
Be prepared for a lengthy process and the potential to break drill bits. Having multiple bits on hand is crucial. It’s not uncommon to require two or even more drill bits to fully remove the bushing. Patience and consistent pressure are vital; rushing will likely lead to frustration and broken tools. This step often consumes a significant portion of the swap’s timeframe.

Manual Transmission Installation
Aligning the manual transmission to the engine requires patience and finesse. Precise positioning is key, as getting it seated correctly can be surprisingly difficult.
Aligning the Manual Transmission to the Engine
Successfully aligning the manual transmission to the engine is arguably one of the most frustrating parts of the entire swap process. It’s not a quick task; be prepared to spend a significant amount of time carefully maneuvering the transmission into position. The clearance is tight, and even slight misalignments can make it incredibly difficult to get the bolt holes lined up.
Take your time, and don’t force anything. Using a transmission jack is highly recommended, as it allows for precise adjustments. Consider having a helper guide the transmission while you make adjustments from underneath. Remember, patience is crucial here – rushing will only lead to frustration and potentially damaged components. It truly takes consideration!
Installing the Bellhousing Bolts (Difficulty & Access)
Installing the bellhousing bolts presents a significant challenge due to limited access and awkward angles. This is where having the right tools – specifically extensions and swivels – becomes absolutely essential. Reaching all the bolts, particularly the upper ones, can be incredibly difficult without these tools.
Expect to spend a considerable amount of time wrestling with the bolts, getting them started, and then torquing them down to the correct specification. Don’t strip the threads! A magnetic extension can be a lifesaver for retrieving dropped bolts in tight spaces. Proper preparation and patience are key to conquering this step.

Clutch and Flywheel Installation
A new clutch is highly recommended during the swap. Ensure proper flywheel installation, adhering strictly to the specified torque settings for optimal performance and reliability.
Flywheel Installation and Torque Specifications
Proper flywheel installation is crucial for a successful 240sx manual swap. Clean both the crankshaft and flywheel mating surfaces meticulously to ensure a flush, vibration-free connection. Apply a light coating of assembly lube to the pilot bearing before installation.
Torque specifications are paramount; failing to adhere to them can lead to premature failure or even catastrophic engine damage. While specific values vary based on the flywheel material and manufacturer, a common range is 80-90 ft-lbs.
Use a torque wrench and follow a star pattern when tightening the flywheel bolts in multiple stages. This ensures even clamping force and prevents warping. Double-check the torque after a short driving period to confirm everything remains secure. Ignoring these details can negate the benefits of the swap.
Clutch Installation – New Clutch Recommended
A new clutch kit is highly recommended during a 240sx manual swap; don’t risk reusing a worn-out clutch, as it will negate the benefits of the conversion. Align the clutch disc correctly with the pilot bearing using a clutch alignment tool – this is essential for smooth transmission installation.
Carefully slide the transmission onto the engine, ensuring the input shaft engages fully with the clutch disc. Apply a small amount of grease to the input shaft splines to facilitate smooth engagement.
Double-check the clutch disc’s orientation before fully seating the transmission. A reversed clutch will render the system inoperable. Proper installation guarantees optimal performance and longevity, avoiding costly future repairs.

Wiring and ECU Considerations
Wiring involves connecting reverse lights to the transmission switch, and potentially jumping a cable. OBDII (96+) models may require a manual ECU to avoid error codes.
Wiring for Reverse Lights
Successfully wiring the reverse lights is a straightforward part of the 240sx manual swap process. The key is to locate the reverse switch on the new manual transmission. You’ll need to connect the wiring from your vehicle’s reverse light circuit to this switch. Essentially, you are transferring the function previously handled by the automatic transmission to the manual setup.
This typically involves identifying the correct wires – often a positive and a signal wire – and securely connecting them to the terminals on the reverse switch. Ensure a solid connection to prevent intermittent operation. Online guides can provide specific wire colors for your 240sx model, but always double-check with a wiring diagram for accuracy. Proper wiring ensures your reverse lights function correctly, enhancing safety and visibility.
ECU Compatibility (OBDII 96+ Models & Potential Codes)
ECU compatibility is crucial, particularly for 1996 and newer (OBDII) 240sx models undergoing a manual swap. While the automatic transmission ECU can function initially, it’s highly likely to generate diagnostic trouble codes. This occurs because the ECU expects signals from the automatic transmission that are no longer present with the manual setup.
To avoid these codes and ensure optimal performance, switching to a manual transmission ECU is strongly recommended. This eliminates the mismatched signals and allows the ECU to properly manage the engine and transmission. Ignoring this can lead to a check engine light and potentially affect vehicle operation. Research the correct ECU for your specific year and engine configuration for a seamless integration.

Driveline Modifications
The automatic driveshaft is incompatible with the manual transmission; it won’t even align. A custom driveshaft is essential for proper fitment and functionality.
Driveshaft Compatibility (Automatic vs. Manual)
A crucial aspect of the 240sx manual swap involves the driveshaft. Despite some online suggestions, the automatic transmission driveshaft absolutely will not work with the manual transmission. Attempting to use it will reveal a significant misalignment issue – it simply won’t line up correctly for installation. This incompatibility necessitates a custom driveshaft solution to ensure proper power transfer and vehicle operation.
Therefore, budgeting for a custom driveshaft is a non-negotiable part of the swap process. Ignoring this requirement will halt progress and require an additional, often unexpected, expense. Accurate measurements are vital when ordering a custom driveshaft to guarantee a perfect fit and avoid vibrations or other drivetrain problems.
Custom Driveshaft Requirements
Ordering a custom driveshaft for your 240sx manual swap demands precision. Accurate measurements are paramount to avoid vibrations and ensure proper drivetrain function. You’ll need to specify the correct length, taking into account the manual transmission’s different output flange position compared to the automatic.
Furthermore, consider the driveshaft’s diameter and U-joint types for optimal strength and compatibility with your rear differential. Many shops require detailed information about your specific 240sx model year and the transmission you’ve installed. Don’t hesitate to consult with a driveshaft specialist to confirm the correct specifications before placing your order, preventing costly errors and delays.

Post-Swap Checks and Adjustments
Verify fluid levels in both the transmission and differential post-swap. Proper clutch pedal adjustment is crucial for smooth engagement and optimal driving performance.
Fluid Levels Check (Transmission & Differential)
After completing the manual swap, meticulously check the fluid levels in both the newly installed transmission and the differential. Specifically, the transmission requires Redline 75W-90 GL4 gear oil – avoid GL4/GL5 compatible alternatives to protect your synchros. You’ll need approximately 2.4 liters, costing around $15 per bottle.
Ensure the fill plugs are accessible before draining any fluids! Carefully fill the transmission until the fluid reaches the appropriate level, typically verified by removing the fill plug and observing overflow. Similarly, inspect the differential fluid level and top off as needed. Proper fluid levels are paramount for smooth operation and longevity of these critical components, preventing premature wear and ensuring optimal performance.
Clutch Pedal Adjustment
Following the manual swap, proper clutch pedal adjustment is crucial for a smooth and reliable driving experience. Ensure the pedal has adequate travel and engages the clutch fully. Insufficient travel can lead to incomplete gear changes, while excessive travel may cause difficulty selecting gears.
Adjust the clutch cable or hydraulic system (depending on your setup) to achieve the optimal pedal feel. A properly adjusted clutch should engage smoothly and predictably, allowing for effortless gear transitions. Test the adjustment thoroughly by shifting through all gears, verifying full clutch engagement and disengagement. Fine-tune as needed for a comfortable and responsive driving experience.